Sunday, August 23, 2009

One Local Summer Week 12


Our harvests are getting bigger and bigger ever week. My impatience at the beginning of the summer has turned into desperation to find a new way to use up all our fresh food! Luckily we have great neighbors to share with and a huge freezer to fill up. Fortunately, our tomatoes are still surviving and today I picked about 12 pounds of tomatoes, just in time for my first venture in canning.


As for ways to use up the harvest, I do have a few tricks left for that. Growing up in an Italian family with a huge garden, I was used to spending the summer enjoying special foods that only came once a year. There were certain foods in our house that were never brought home from the grocery store, especially out of season. Somehow has a kid, I never did like tomatoes, even the home grown ones, or squash. One of the few ways I would actually eat any vegetables was in my mom's giambrot'. (Pronounced: jom-braut) Giambrot' is one of those family recipes you can never find in a cookbook, most likely because the name we call it is most likely some sort of dialect, which would make it hard to look up in a proper cookbook. After taking some Italian in college and learning how to read and write the language, I have some ideas of where the word may actually come from. Probably something to Google some day soon... Most people when they taste it, or here it described would exclaim, "Oh, right, like ratatouille!" Ok, well probably, in some form...but I don't suggest you mention that to too many proud Italians ready to serve you some homemade, fresh from the garden giambrot'!

Giambrot'

1 eggplant, peeled and cubed
1 zucchini, cubed
1 clove garlic, smashed
1 bell or cubanelle pepper, diced
1 hot pepper, diced (more or less to your liking)
chopped tomatoes (add as needed)
olive oil
salt and pepper

The great thing about this recipe is that it can be adjusted to your liking, and to what you have on hand. Many times I use green beans, or I may omit eggplant when they aren't available yet.

In a small saucepan, warm 2 Tablespoons olive oil and the garlic over medium heat. When the garlic begins to sizzle, add the peppers. Cook until they begin to soften. Add the eggplant, and stir to coat all the eggplant. Allow to cook together for about 5 minutes, adjusting the heat so the eggplant does not brown. Add the zucchini and stir. Add the tomatoes and stir. You can add as many tomatoes as you wish, depending on how thick you would like your giambrot'. Taste for seasoning and add salt and pepper as necessary. Allow the vegetables to simmer until they are cooked to your liking, I never like mine too mushy! Serve alongside your main dish, with fresh basil and drizzled with olive oil.

Monday, August 17, 2009

One Local Summer Week 11


I am so amazed that August is half over already. This summer has really flown by, though it didn't help that our rainy, cold June made it seem so short either. August is really a great time for cooking and gardening though. Our eggplants are finally catching up with the rest of our vegetables, and we are having a very difficult time finding ways to use up our cucumbers (giving them away doesn't seem to help either!). I'm surprised that we haven't had an overabundance of squash, which isn't so bad, and the cucumbers make up for that anyway. We've also been harvesting a large amount of scarlet runner beans which we have been cooking as broad beans (you can leave them on the vines to dry and shell). Our peppers are slowly maturing, we have plenty of small ones on our plants, so I'll need to collect some recipes for those soon!

The dish I wanted to share this week is the dish I wait all year for. As soon as the eggplants are ready, the first thing I cook is the famous Sicilian dish, Pasta alla Norma.

Pasta all Norma - Serves 4

1 medium eggplant, preferably heirloom
2 cups chopped fresh tomatoes, or tomato sauce
1 clove garlic
fresh basil
olive oil
salt and pepper
3/4 pound of pasta
ricotta salata

First peel the eggplant. Cut in half. Cube half of the eggplant and slice the rest. Place the eggplant into a colander and sprinkle with salt. Place a plate on top of the eggplant with a weight (maybe a can, or bottled drink) and leave for about 1 hour. Remove the weight and plate and lightly rinse the salt off the eggplant. Gently squeeze the liquid out of the eggplants and leave on a towel to dry.

Bring a large pot of water to a boil. Meanwhile, place a large skillet over medium-low heat and add olive oil to coat. When the oil heats and you see it shimmer, lay the eggplant slices in the pan to fry on both sides. The eggplant should be fairly soft and a bit brown. Place the eggplant on a dish and reserve. Smash the clove of garlic; it can be sliced, minced or left whole, as you like. Add the garlic to the pan. When you begin to smell the garlic, and before it browns, add the cubed eggplant. Stir the eggplant often as it cooks. The eggplant at first may draw in some oil, but as it cooks it will begin to release some oil. When that happens, add your tomatoes to the skillet. Stir together and then leave to simmer, adjusting the heat as needed. When the water comes to a boil, cook the pasta according to the directions. Drain the pasta when it is al dente and add to the sauce. Taste for salt and pepper. Add the basil, shredding with your hands as you add it. Drizzle some more olive oil and toss the pasta and sauce.

Serve the pasta with some eggplant slices on top, grated ricotta salata, and more fresh basil. Mmmmm....summer pasta!

Wednesday, August 12, 2009

Scarlet Runner Beans


We picked these today, still a little young for eating as shellies, but they are beautiful!

Sunday, August 9, 2009

One Local Summer Week 10

Finally!


It seems from this haul that summer is really here! The Yankees are in first place, the warm weather has arrived and the garden is in full swing. Makes that wet, cold June so far away.

Last week while shopping at Marshall's in the cooking section, I came across a can of clams. To my surprise, when I looked closer at the label I realized they were from Maine. What a great find; I love having canned clams around for a quick meal, and what a bonus to have some that would even be local for us!

Linguini and Clams Casino (for 4)

3/4 pound of linguini
1-2 cans of clams
olive oil
1 clove garlic minced
4 slices bacon, chopped
oregano (we used fresh from our garden)
salt and pepper
white wine or seafood stock (I freeze mine in ice cube trays to use a little at a
time.)

Bring a large pot of water to a boil, and salt heavily. Add the linguini and cook to al dente. Meanwhile, warm a skillet over medium-low heat. Add enough olive oil to coat the pan. Add the bacon to the pan and cook until just crisp, but not too brown. Add the garlic, cooking until you can smell it, but not browned. Add the clams, with their juice. Turn the heat up so the juices begin to bubble. The liquids should thicken up a bit, and if you go too far, add a splash of wine or cube of stock to the pan (you can also add either for flavor if you wish). Add salt and pepper to taste. When the pasta is ready, add it immediately to the pan. Add the oregano and stir up the pasta and sauce well.

You could also add chopped tomatoes or chopped red bell pepper to this dish if you wish. It's also best served with a sprinkling of crushed red pepper on top.

Monday, August 3, 2009

One Local Summer Week 9


Squash and eggs. For me, one of the most comforting things about summer. Growing up in an Italian family, we often had traditional Sunday suppers, where we all sat down around 2 in the afternoon to a huge bowl of pasta (usually rigatoni, but ravioli as a special treat...no wait, rigatoni with ricotta cheese! that was a special treat) with meatballs and sausage. Now, eating what would be a usual weeknight dinner so early in the day always meant that around 8 o'clock everyone was hungry again. Most times I can remember reheating pasta fazool, or some leftover pizza, but during the summer? Many nights it was squash and eggs. Squash fried up in a pan, scrambled eggs dumped on top and cooked until they were good and brown. And always eaten on the rest of the Italian bread from supper. It seems there must have been something a bit magical about that dish, because it was the only way I ever ate zucchini when I was a kid. Now, summer is never complete without a squash and eggs sandwich eaten on a Sunday night.

Squash and Eggs (two ways)

For the sandwiches:

eggs (1-2 per person)
small onion, minced
fresh zucchini or summer squash, cubed (1 small is good for 4)
Italian bread (ciabatta perhaps?) or sub rolls

Heat up a pan over medium heat with some olive oil, enough to coat the pan. Toss in the onions and cook until nearly browned. Add in the squash. Cook until at least soft, or cook until they are browned if you like them that way. While the squash is cooking, break up the eggs in a bowl. Once the squash is cooked, reduce the heat to low and add the eggs. Stir the eggs, squash and onions in the pan as the eggs cook. You can keep your eggs on the soft side if you like, but in this dish it's fine to really cook them. Add salt and pepper to taste, and put the hot eggs onto your bread. Top with some grated cheese, or not, and enjoy. Just remember to keep a tight hold on your bread, the eggs always try to squeeze out the other end!

Squash stuffed with eggs (for 4)

2 zucchini, either large or round for stuffing
3-4 eggs
1 small onion
olive oil
salt and pepper
fresh herbs

Preheated 350 F oven

Cut the zucchini in half and scoop out the middle and reserve. Rub the insides with olive oil and season with salt. Place zucchini halves on a sheet pan or baking dish and place in oven for about 10 minutes. Meanwhile mince the onion and chop the reserved zucchini. Heat a pan over medium heat with enough olive oil to coat the pan. Add the onion and zucchini along with a pinch of salt (I find when frying onions that salting them helps to keep them from burning). Beat the eggs with the vegetables are cooking. When the onions and zucchini are done, reduce the heat to low and add the eggs. Stir the eggs while cooking. They are done when they are still a bit soft. Season with salt and pepper. Remove the zucchini from the oven and add the eggs to each. Return the zucchini to the oven for 5 minutes. Before serving, add some chopped fresh herbs (I love oregano with these) or grated cheese.

Another version of this (in the picture above) is to use a round squash and bake an egg inside of it. Bake the squash shell as above. Instead of using scrambled eggs, break an egg into the squash and return it to the oven. Bake for about 10-15 minutes, or until the whites are set. I find this method a bit hard to get the yolks just right...most times mine end up a bit overcooked.

Tuesday, July 28, 2009

One Local Summer Week 8

This post will be a quick and light one. I'm currently on an older, slower desktop due to a mishap with a little boy, a glass of wine and a laptop.


Scaccia ai Broccoli (Double-crusted broccoli pizza)
adapted from: The Italian Farmhouse Cookbook by Susan Herrmann Loomis

1 pound broccoli
Pizza dough (enough for 2 small pies)
8 ounces fresh ricotta (maybe homemade?)
1 clove garlic, minced
Salt and pepper
Crushed red chilis
1 tablespoon extra-virgin olive oil

Steam broccoli until tender, about 6 to 8 minutes. Remove from heat and cool. Lightly oil a baking sheet. Roll out the dough to a 12 x 24 inch rectangle. Make it as thin as necessary. Bring half of the dough onto the baking sheet. Spread the ricotta evenly over the dough that is on the baking sheet. Then sprinkle with garlic, salt and pepper. Next, spread the broccoli evenly over the ricotta. Season again, this time adding chilis. Bring the dough resting on your work surface up and over the filling, pressing the edges together and lightly rolling the edges in. Brush the top with olive oil. Allow the scaccia to rest for 20 minutes. Preheat the oven to 425F. Bake the scaccia for 30 minutes.

Saturday, July 18, 2009

One Local Summer Week 7


Wow, 7 weeks already! The garden is nearly in full swing, and it is hard to keep track of the local food we've been enjoying lately. Our squash and peas are ready daily, and the broccoli and cauliflower are getting bigger everyday. I am trying to be patient before harvesting those, it would be nice to see how big they can get! Fortunately with the broccoli, after the first harvest, you still get the nice shoots they grow in after (and for which you pay a lot of money for at the grocery store). We have tasted one of our carrots, and one beet, but again, I'm trying to hold out and let them grow a bit more. The lettuce is still growing nicely, I suppose the one good thing from that long rainy month of June. I am certainly not happy about the fact that I am still waiting on our first tomato! (The sungolds should be ready in a day or two.)

We've been able to enjoy at least one or two locally grown (or garden grown) side dishes this past week. I am hoping this makes up for in a small way the terribly non-sustainable entree we had tonight: grilled swordfish. Oops. At least we served our own cauliflower and the potatoes we found growing in the compost pile.

One of my favorite dinners this week was pizza. Well, that's always my favorite. In any case, the dough this week was not the best we've ever used; I tried the no-knead version, and my husband had a difficult time working with it. It also didn't have quite the same texture that my usual recipe does. From the reviews I have seen of the no-knead recipe, it seems there must have been something I was missing. Luckily enough, the toppings made up for what lacked in the dough. We used some freshly harvested zucchini and squash blossoms, canned tomatoes, mushrooms, and some homemade mozzarella.


To make the pizzas, I used the no-knead pizza dough recipe found here. Because the dough was so soft, we decided to grill the pizzas a bit first before adding any of the toppings. We like to use a wooden peel to transfer the pizzas to the grill, so any toppings added must be done quickly otherwise the dough will begin sticking to the peel. The dough we used was so soft, it began sticking to the peel right away. After grilling the dough for a minute or two, we put it back on the peel and added the toppings. Then, back to the grill to finish cooking the dough and melting the cheese. Just be sure to have some great beer to wash it all down with!

Sunday, July 12, 2009

One Local Summer Week 6


I'm so disappointed to have missed my post last week, but with all the rain making it hard to harvest local ingredients, and leaving early for our annual July family visit, I never got the chance to make a local meal. The closest I got in fact, was the Hummel's hot dog I ate on my way to Yankee Stadium on Friday. (By the way, if you have never had a Hummel's and you eat hot dogs, you need to make a point of getting to Connecticut to try one...there's nothing like it!) Thankfully we are finally seeing the sun again in New England (I may even turn on the sprinklers soon!) and I was able to get some great ingredients from our garden.

While in Italy some years ago, I had my first taste of squash blossoms. Unfortunately, once I returned to the States I was never able to find them again. One of the reasons we wanted to start our own garden was to be able to grow the ingredients we have not been able to purchase. When choosing zucchini to plant, I make it a point to find one or two varieties that claim to have numerous male blossoms (these do not produce fruit, but are needed for pollination) that are great for eating.

Farfalle with baby peas and squash blossoms

3/4 lb of farfalle (or any short dried pasta)
1 cup baby peas
12 male squash blossoms
2 Tablespoons European style butter


Bring a large pot of water to a boil.
If you have fresh peas, be sure to shuck them before cooking, you don't want snap peas in this dish.

To prepare the squash blossoms, rinse them gently under cold water to remove any debris. Carefully open the blossom, and pull out the pistil. Remove the blossoms from the rest of the stem. Chop the blossoms into fairly large pieces.
Once the water is boiling, salt it and add the farfalle. Cook the pasta to al dente, according to package directions. When the pasta has about 4 minutes remaining, begin to melt the butter in a large skillet over medium-low heat. Do not allow it to brown. With 2 minutes remaining, add the blossoms to the butter and gently cook. Add the peas to the pasta pot when there is 1 minute left to cook. Drain the pasta and peas and add to the skillet. Toss the pasta, peas and blossoms together in the butter and remove from heat. Serve immediately with cheese - a fresh ricotta, feta or goat cheese is best, but you can never go wrong with a bit of parmigiano reggiano.


Posted by Picasa

Sunday, June 28, 2009

One Local Summer Week 4

Samplings from week 4 meals :


Squash sauteed with garlic scapes

2 summer squash or zucchini, sliced
1 garlic scaped, chopped
olive oil

Warm olive oil over medium heat in a skillet. Add squash and scapes. Saute until squash is browned, then turn over and continue to cook until all or most of the pieces are browned. Add salt (fleur de sel preferably) and pepper to taste just before serving. A pinch of pepperoncino is great too!


Boiled Lobsters

Fill a large stockpot with enough water to cover your lobsters and bring to a boil (feel free to use sea water if you have access to it!). Add a handful of water to the pot, and plunge the lobsters into the water (head first!). Bring the water back to a boil, and then begin timing the cooking according to their weight; 8 minutes for the first pound, 3 minutes per pound thereafter. When they are done cooking, pull them out and allow them to rest on a platter. Serve with melted butter, but great fresh lobsters don't really need anything!

Local cheeseburger (from Savage Road Farm), with Cabot Cheddar and a tomato from the Exeter Farmers' Market.

Homemade Cheese Ravioli (Serves 4)

Fresh pasta dough, rolled out into thin sheets (made from 3 eggs and 3 cups flour)
8 oz. fresh ricotta (ours was homemade from local raw milk) - this needs to be of great quality,
really smooth and creamy!
2 Tablespoons finely chopped parsley
3 oz grated Parmesan cheese
1 egg yolk
Pinch of nutmeg

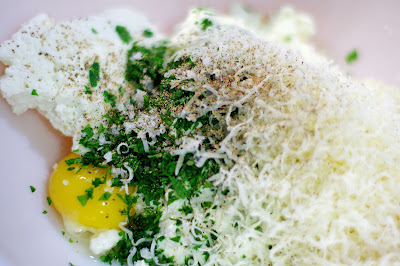
Combine the filling ingredients (parsley, cheeses, yolk and nutmeg) in a mixing bowl. Mix well and set aside.
Lay out two sheets of pasta side by side. Have a small cup or bowl of water nearby to help seal the pasta. Lay a tea towel onto a tray our cookie sheet and sprinkle with flour; you will need this ready when you finish cutting the ravioli. Scoop one tablespoon of the filling onto one of the pasta sheets. Continue to add the filling to the past at 1/2 inch intervals until the sheet is filled.


With your finger, take the water and outline the scoops of the filling, like you are painting the pasta. Lift the other sheet on top of the pasta and ravioli filling. Carefully press down, starting close to the filling, so you can press out as much air as possible.


Using a pastry or pasta roller, cut the ravioli into squares or circles.


Try to cut as close to the filling, without leaving too much extra pasta around the edges. The edges don't cook as quickly as the rest of the raviolo, and tend to be a bit firm. For the round ravioli (which I prefer, in order to avoid the thick edges and get more filling with every bite!) I used a large coffee scoop to imprint an outline before cutting with the roller. I'd love to find a mini cookie cutter to use from now on though!

Place the finished ravioli on the tea towel, and continue the process until you have used all of the filling. Most times you will have some pasta dough left over, which can be cut and dried to be used later. It does not save well without being cut first.


If you wish, the ravioli can be frozen immediately on the tray and bagged for use at a later time. To cook the ravioli, bring a large pot of water to a boil. Add a good handful of salt. Add the ravioli, and when the water comes to a boil again, lower the heat so the water is just above a simmer. Cooking these in boiling water will most likely cause them to burst. Check the ravioli often, they will float to the top, so I use a spoon to push them down while they cook. The ravioli will take about 5-7 minutes to cook, but I like to test them by taking a bit from the edges. Remember, the edges will be more firm then the rest, and should be cooked al dente. Drain the ravioli as soon as they are done.

These are great served with a butter and sage (fresh from the garden!) sauce or a light tomato sauce.


Local sources:

Cabot butter
Exeter Farmers' Market
Defiant Lobster Co.
Savage Road Farm
Magic Hat Brewery - Wacko

Tuesday, June 23, 2009

Taming the tomatoes

It seemed not too long ago that most of our tomatoes were not looking like they would ever grow more than a foot tall. We coaxed them a bit under the row covers longer than we first intended, but then again, this cool weather has lasted longer than we expected it to! Surprisingly enough the tomatoes have quickly grown to this state:


Slowly but surely, we're working out a system to tame these tomatoes. First, I had to get in there and prune the largest plants. Too many of them had branches and leaves on the ground, and because the stems were so heavy, much of the new growth was growing down instead of up. (I actually thought it was pretty cool that our heirlooms are the heartiest plants of the bunch.) We will be using a stake-and-trellis method, and instead of going out and buying new stakes, we decided to take some of the old branches from our burn pile. I am really loving the look of the branches, and after getting up some twine to hold up the plants I will be getting the longer branches up near the beans so that the scarlet runners can grow up instead of twisting around each other on the ground (when I hold them up, they are already about 4 feet tall!). And if that's not enough to have to catch up on, the weeds are out of control and we have a new pest to fend off around the squash and beans; black aphids. At least this time around, I won't kill the plants while trying to fight them. I'll be spraying that homemade hot pepper spray on a cloudy day.

Friday, June 19, 2009

One Local Summer Week 3

Maybe it was the rain this week, but for whatever reason, coming up with and cooking a local meal was really hard this week. By the time I even got around to cooking dinner on Thursday, I realized the short ribs we were going to be having were still frozen, and probably not going to turn out too well. And I was right. At least I cooked up some fine creamed spinach to go along with them...and some toasted locally baked multigrain bread to go along with it all didn't hurt either.


Easy creamed spinach:

1 Tablespoon bacon grease (we always save some from fried bacon and keep it in the fridge)
1 Tablespoon butter
1 pound fresh baby spinach
1/4 cup whole milk
1/8 cup sour cream
salt to taste

Wash spinach well, making sure to get out all the sand. Melt the butter and bacon grease over medium heat. Add the spinach to the pan and cover immediately so that the spinach will steam in the water still on the leaves from washing. When the spinach is cooked add the milk and sour cream. Stir well to combine, creating a sauce in the pan. Turn heat to low, and continue to cook until the sauce is to the desired thickness. Taste for salt and season as necessary (I found with the bacon fat and butter that none was needed).

As for the short ribs, they were braised in beet juice and honey. While the sweetness was nice, it would've been even better with a splash of vinegar to create a sweet and sour sauce for them.

Local ingredients:

Butter: Kate's Homemade and Vermont Butter and Cheese
Honey: Paradise Farm, Wilton, NH
Beet juice: Nashua Farmers' Market (frozen puree from last summer)
Short ribs: Savage Road Farm, Milford, NH
Milk: Fitch's Dairy Farm, Milford, NH (raw milk!)
Bacon grease: Garfield's Smokehouse, NH
Spinach: Locally Known, Maine, found at Trader Joe's in Tyngsboro, MA
Sour cream: Hood
Bread: The Good Loaf, Milford, NH

Sunday, June 14, 2009

One Local Summer Week 2


First, I have to confess I kind of cheated this week...we spent last weekend in Connecticut, so I was able to pick up a few ingredients that weren't quite ready up in our local area. I was figuring that since we were down there visiting family anyway, it wouldn't really add to our carbon footprint, but was just really a good opportunity to expand our local food zone. Right? So, I picked up some peas, spinach (I used later in the week), soda (Foxon Park, out of East Haven, made with real sugar!) and we picked some fresh strawberries from our friend's garden. As soon as I saw the peas I knew exactly what I would make this week, a spin-off of a traditional Italian dish using some locally raised pork....

Spezzatino di Maiale (adapted from Marcella Hazan's Spezzatino di Vitello recipe)

1 pound pork steak (or shoulder, anything good for braising), cut into 1 inch cubes.
1 pound peas (pre-shelling weight)
1 small shallot, minced
1 cup crushed tomatoes
1 tablespoon butter
2 tablespoons olive oil

In a heavy pot or dutch oven, heat the butter and oil over medium heat. When the butter has stopped bubbling, add the shallot. Allow the shallot to cook until soft and almost browning, then add the pork. Brown the pork on all sides. Add the tomatoes, bring to a boil, then cover and turn the heat to low. The tomatoes should barely be at a simmer. Cook the meat for 1 1/2 hours. About 15 minutes before the meat finishes cooking, add the peas to the pot.


This dish is great served along side potatoes, or as more traditional in Italy, to be served after a risotto or soup dish.
Peas: Brookside Gardens, Woodbridge, CT
Pork: Savage Road Farm, Savage Rd. Milford, NH (link is a map, they have an outdoor freezer open on weekdays)
Potatoes: Maine
Gassosa Soda: Foxon Park, East Haven, CT
Salad Greens: our garden!

Thursday, June 11, 2009

Late update: more planting

This is one of those updates that never actually happened. I had all intentions of adding these planting dates, but never actually did. Luckily I did add the dates to my journal so I really know when I planted these!

Red cabbage: 5/12

Beans - Scarlet Runner and Cannellini: 5/20

Cucumbers: 5/18
Super Zagross Middle Eastern Cukes: 5/19 (seeds)

Eggplant - Calliope, Ghostbuster, Little Fingers, Twinkle: 5/18

Kale - Lacinato/Nero Toscana: 5/12

Red Leaf Lettuce: 5/12

Green Peppers: 5/15, 5/18

Popcorn - Dutch Butter: 5/12, 5/19

Spinach: 5/12

Tomatoes - Plum, Jet Star, Early Girl, Black Krim, Costoluta Genovese, Green Zebra,
Mr. Stripey, Box Car Willie, Sungold, Yellow Brandywine, Juliet: 5/17

Zucchini - Cocozelle, Costata Romanesca, Black Beauty, Tondo Chiaro di Toscana: 5/19

Flowers - Nasturtium, Torch Sunflower, Marigolds, Zinnia, Cosmos: 5/17

Herbs - Basil, Oregano, Thyme: 5/17

The garden has really taken off with the recent rain and plenty of sun that we've had. Unfortunately, we have yet to put up any stakes for tomatoes, or trellises for the peas and beans. I think we are looking to build this kind of set up for the tomatoes: Stake-and-weave trellis system. We have corn growing behind our peas in hopes to use the corn as a trellis, but the peas are growing much faster than the corn right now, so I am unsure about that system actually working. I was hoping to build teepees for the beans, as I planted them in little squares in the rows in order to do that eventually.

The lettuce is growing nicely, and providing us with more than enough for salads everynight. The arugula has begun to bolt and go to seed, so it is much to spicy for eating now. I will have to try and plant more, as well as new lettuce before we finish harvesting the heads we have now. In any case, the lettuce is far more successful than in our smaller garden last year, where it bolted before we harvested any for eating.

Sunday, June 7, 2009

One Local Summer 1st week

Eating local here in New Hampshire is still a bit hard as far as fresh vegetables go, though we are harvesting more than enough salad greens to enjoy with every meal. For this week's meal I focused more on the proteins of the meal, which are available year round from local sources, right here in town. We dined on a local version of Spaghetti Carbonara, with homemade pasta made from fresh duck eggs and NH smoked bacon. Unfortunately the semolina flour was from Bob's Red Mill in Oregon, but that was the only ingredient (aside from salt and pepper) that came from far away.


Spaghetti Carbonara (New Hampshire version)

serves 4

For the spaghetti dough:

3 eggs (we used duck eggs)
2 cups semolina flour
1 cup AP flour

Create a well on a board or counter in the flour. Crack the eggs into the well, and scramble the eggs slowly using a fork. Gradually bring the flour into the eggs until the eggs become thick enough that they will not run out onto the board. Using your hands, bring in the rest of the flour (adding water if necessary) until a ball forms. Knead the dough for at least 10 minutes, until it becomes smooth. Allow the dough to rest for about 20 minutes. After resting, cut the dough into smaller pieces, about the size of a golf ball. Using a pasta machine, roll out the dough to the second to last setting on the machine. Lay out all the pieces, allowing them to dry out a bit to prevent the dough from sticking in the next step. (You may also need to flip them, or rub a bit of flour over them to help the drying) Using the thinnest noodle cutters, cut the dough and lay onto towels or on a rack to dry.

Get a pot of water to a boil on the stove.

For the carbonara:

6 slices of bacon, chopped
1 tablespoon bacon drippings or oil
2 eggs

In a skillet melt bacon drippings. Add the chopped bacon to the skillet and cook until crisp; it is better to get them quite crispy since they soften up a bit when mixed with the pasta. Begin cooking the pasta, it should only take 3-5 minutes, and will be ready when the bacon is ready. While the bacon and pasta are cooking, beat the eggs into a serving bowl, large enough to hold the pasta.

When the pasta is finished (cooked al dente) reserve a bit of the cooking water and immediately drain the pasta. Quickly add the drained pasta to the bowl, and begin tossing with two forks, which will help to cook the eggs. Add the bacon, and all the drippings from the pan to the pasta. Continue to toss the pasta for about 2 minutes, adding some of the reserved cooking water if the pasta seems dry. You will notice that when you continue to toss the pasta a creamy sauce is created right in the bowl from only a few simple ingredients.


Local sources:

eggs: Fitch's Farm, Milford, NH
bacon: Garfield's Smoked Bacon (purchased from Lull Farm)

Wednesday, May 27, 2009

Spring Flowers

Here's a small sample of the flowers we have seen popping up around here this spring...


Here's a small sample of the flowers we have seen popping up around here this spring...

Friday, May 8, 2009

More planting

This is the time in gardening I most look forward to - planting dates beginning! I really enjoy being able to have a garden to tend to, but sometimes it seems that there isn't much tending to do at all. Or, that the weeds have gotten so out of hand that there is too much to tend to. I of course enjoy the harvesting, but that's too easy...it's really the eating that I enjoy from that, which is no work at all. It seems now that the time when we can start getting more and more plants or seeds in the ground is upon us. Here's what we've been up to lately:

Arugula: 4/10 and 4/28 (I tried making a seed tape, but I don't think they are germinating)

Beets, Golden Detroit: 4/15, 4/29 (looking good so far)
Bull's Blood and Chiogga: 4/29

Carrots: 4/15 (they've sprouted nicely!)

Lettuce: Salad Bowl Mix: 4/28, all are sprouting nicely, and we've transplated successfully the heads that are growing too closely.

Radishes, French Breakfast: 4/15 (looking good, about 2 weeks until harvest!)

Peas, Wando Shelling: 4/28, 5/8 (filled in the holes where seeds did not germinate)

Squash, Trombocino: 4/29 (I don't think these will germinate, the heat wave got me overly ambitious!)

Broccoli, Packman (transplants): 5/3, 5/7

Cauliflower (transplants): 5/7

Parsley (transplants): 5/3

In the kids' garden: Peas: 4/28
Green Beans (transplants): 5/7
Broccoli: 5/7

Friday, April 10, 2009

Early season gardening

So far we have done a decent job getting an early start to the garden this year. We got a huge delivery of "super soil" (a soil/compost blend) to the garden the last week in March. The boys were really excited about that. What could be better on a Saturday morning than watching a dump truck drive through your yard to dump some dirt piles? Oh yeah, playing in those dirt piles that afternoon...


The dirt has been shoveled around the garden to make two large beds with one long path for flowers down the center. Hopefully the added depth will give us a little help with the horrible rock and clay conditions found here in New Hampshire. With the dirt in we were able to start on our spring seeds: Wando Shelling Peas (3/30 and 4/9), Black Seeded Simpson Lettuce (3/30), Salad Bowl Mix (3/30 and 4/9) and Arugula (4/7).

Though the morning started out cloudy and rainy we lucked out and enjoyed a sunny afternoon at a maple sugar house in Lyndeborough. Maple weekend is always a fun little activity celebrating the beginning of spring around here. Last year we checked out Ben's Sugar Shack, but this year we headed to the Maple Guys Sugar Shack, which was a bit closer to us, and I kind of liked their syrup better. It had a nice smoky flavor to it that I never noticed in other syrups before. Both places offer mail order syrup, so check either out if you are in need of some real syrup!

Thursday, March 26, 2009

Opening Day

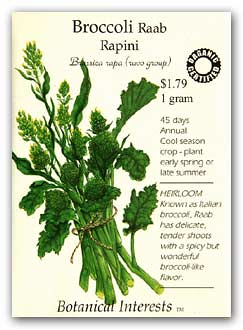
Today was our first day out working and planting in the garden. We worked on getting a few rocks out of the garden, but mostly, accomplished our two goals of getting some old seafood and egg shells out of the kitchen, and seeds into the garden. We put the shells into an old heavy duty plastic bag and crushed them up with a sledgehammer, then sprinkled it over the area of the garden where we are planning to plant our tomatoes. I am hoping to use eggshells for the tomatoes, and I read that seashells can act as lime, so I think the tomatoes could (hopefully)benefit from that as well. We marked out a small row to plant some broccoli raab seed. Last year we had no luck with the raab at all. It didn't grow very well, and whatever plants we got bolted since it was planted too late. We're about 5 or 6 weeks from our last frost date, so this time I'm hoping our timing is right on. This is one of my favorite vegetables and I have never found it at any of the farmers' markets, so we really need to grow our own. The last job was adding some compost to the seeds. This was a first for me. We started our compost pile last summer and this is the first time I stuck my hands into the stuff. Worms, dirt, some leftover bits of scraps and all...I dug right in. After getting over my initial squeamishness of it, it was a somewhat satisfying way of starting off our 2009 gardening season. Aside from the purchase of the seeds, this crop will be all our own.


Broccoli Raab seeds

(Picture from the BI website, seeds purchased from Ponemah Farms last year)

Botanical Interests
Ponemah Farms

Thursday, January 15, 2009

Strawberry Brown Betty

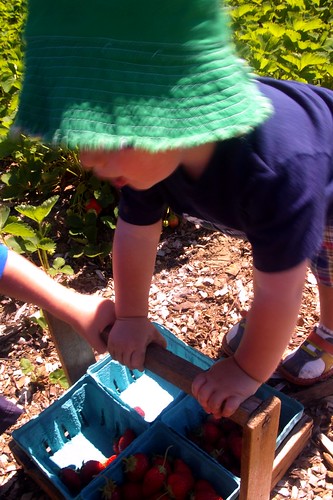
One of our favorite ways of spending a summer morning is to head to one of the local strawberry farms. Everything is still quiet, and the sun has yet to heat everything up again. I admit, the whole process is easier said than done. I have one boy who can do most of the picking on his own and does a good job of it, that is until he picks about 10 berries and claims he is done. I much prefer that, however, over the chasing down of his little brother, running up and down the rows, picking unripe strawberries and eating them before anyone can catch him. We have yet to head home from picking without that little guy covered in strawberry juice. But really, having 2 kids who love fresh fruit and are willing to work to gather some? How could I complain?


This simple and delicious recipe came from 2 sources of inspiration. One was the leftover cider donuts in the fridge, the other, a quart of strawberries picked at a local farm, just on the verge of spoilage. This dessert was really made way back in August, but I chose to bring it out now because someone out there must have a bag of frozen local fruit in the freezer just waiting to be brought out and baked into something. In fact, I am hoping to try our peaches in this very soon.


Strawberry Brown Betty
(Adapted from Mark Bittman's How to Cook Everything: Apple Brown Betty)

4 to 6 servings

4 cups day-old donuts (or bread, cake or biscuits) cut or broken into small cubes
4 cups strawberries (or any other fruit, peeling if necessary) sliced
Juice of 1/2 lemon
1/4 cup brown sugar
1/2 cup white sugar
8 tablespoons (1 stick) unsalted butter

Optional (from the original apple recipe):
1 teaspoon ground cinnamon
1/4 teaspoon freshly grated nutmeg
Pinch ground cloves
Pinch ground allspice


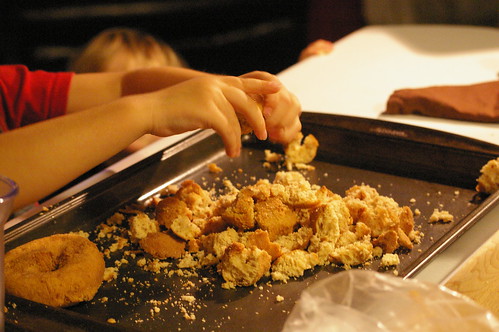
Preheat the oven to 300 F. Place the donuts on a baking sheet and place in the oven. Bake until very lightly browned, about 10 minutes, shaking the pan once or twice during baking. Prepare the fruit and toss with the lemon juice. Melt the butter over low heat.

When the donuts are done, turn the oven up to 375 F. Toss the donuts with the sugars and half the butter. On the bottom of an 8- or 9-inch square baking pan, place one-third of the donuts. Top with half the strawberries. Repeat, then finish with the last of the donuts. Drizzle the rest of the butter over all.

Bake for at least 30 minutes, or until the liquid is bubbly and the top is browned. Serve warm with whipped cream (preferably local and fresh) or ice cream. This can be made ahead and reheated at 300 F for 15 minutes.

Note: Aside from picking the fruit, the kids did a great job breaking up the donuts, cleaning the berries and stirring ingredients together.

  © Blogger template 'Fly Away' by Ourblogtemplates.com 2008

Back to TOP